









- One sided adhesive tapes
- Packing tapes
- Coloured - marking tapes
- Electrical tapes
- Office tapes, adhesive tapes
- Slick surface tapes
- Metal adhesive tapes
- Masking crepe tape
- Masking special tapes
- Surface protection tapes
- Foam - sealing tapes
- Anti-slip tapes
- Self-adhesive rubber cut-outs
- Special tapes
- Textile tapes
- Warning and reflective tapes
- Double-sided adhesive tapes
- Electrical insulation material
- Glues
- Flexible stoppers, bumpers
- Velcro straps
- Primers - activators - cleaners
- Accessories for adhesives, applicators
Calibration of a Zebra label printer? We’ll show you how to do it..
Have you purchased a Zebra label printer and unfortunately, out of nowhere, it starts printing faintly, illegibly, prints only a small or incorrect part of the label, or even "spits out" blank labels between the printed ones? Lately, customers have been contacting us asking for advice on why their particular label printer is acting up like this. Usually, the problem lies in the calibration, which you can easily resolve yourself.
Zebra Label Printer Calibration
Some of you may already be familiar with the term calibration in connection with inkjet or laser printers, but that rather concerns color calibration so that your documents or photographs have rich and, above all, accurate colors. For label printers, we rather mean media calibration, i.e. labels. Zebra label printers can print, for example, self-adhesive labels in many different sizes, and for yours to print them correctly, it needs you to perform media calibration. It is usually performed when, for example, you select different label dimensions, print using different software, or if the temperature in your surroundings has changed significantly. So what should you do if your Zebra label printer prints faintly, illegibly, prints only a small or incorrect part of the label, or even "spits out" blank labels between the printed ones? A more complex method is to calibrate the printer using software, or the driver via a PC. Fortunately, that is not necessary. The simpler way is to calibrate it manually.
Step 1: Check and align the movable sensor
What is the media sensor and what is it used for?
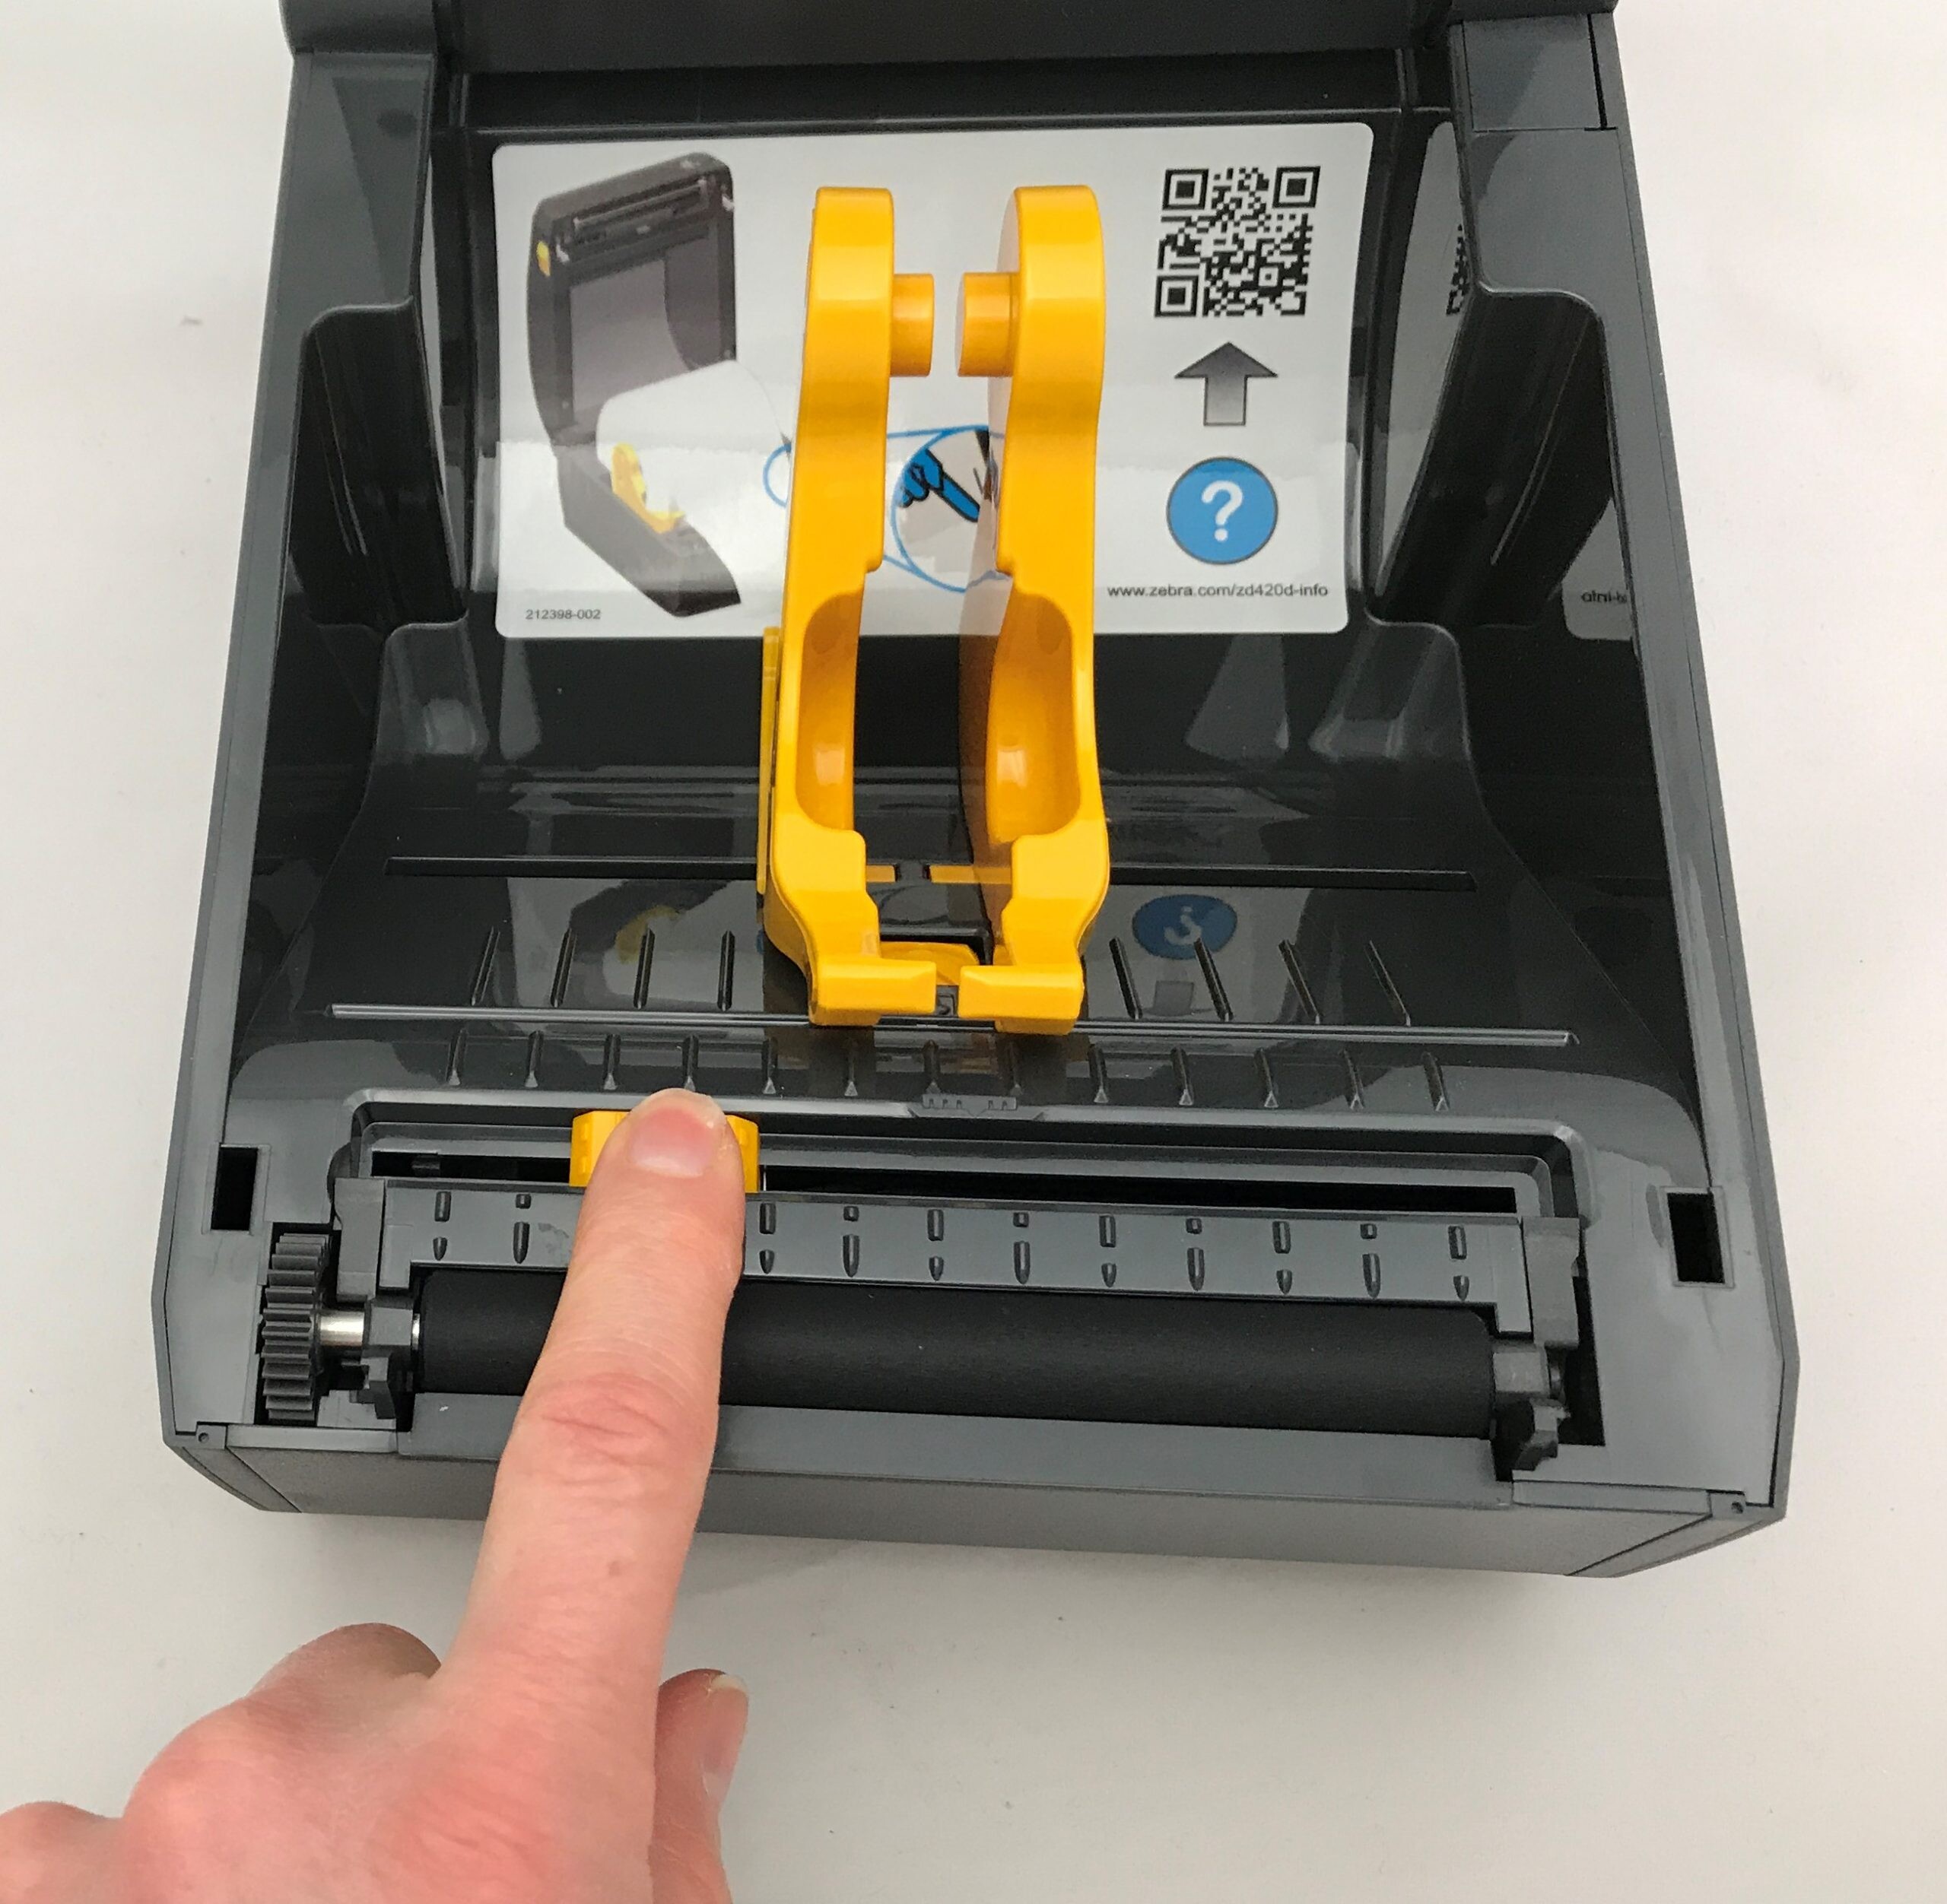
Movable media sensor on Zebra label printers can be found underneath at the label exit after opening the top section (see. image). Unfortunately, it may happen that you accidentally move this sensor while handling the printer, or that you change the label dimensions. This sensor detects where each individual label begins and ends so that it can print on it not only in the correct size and, above all, in the same area, but also so that the printer always feeds the label correctly and does not stop, for example, in the middle of it, but always at its end. It is therefore important to always have it properly centered, and you can tell by the arrows, which should point toward each other. Not every Zebra label printer has the same section in which the sensor can be moved (for example, the Zebra ZD220 label printer has a movable section only across half the printer's width), but the sensor should always be in the middle of the printer. You may need to perform this process several times, until the sensor beam finds the gap between the labels.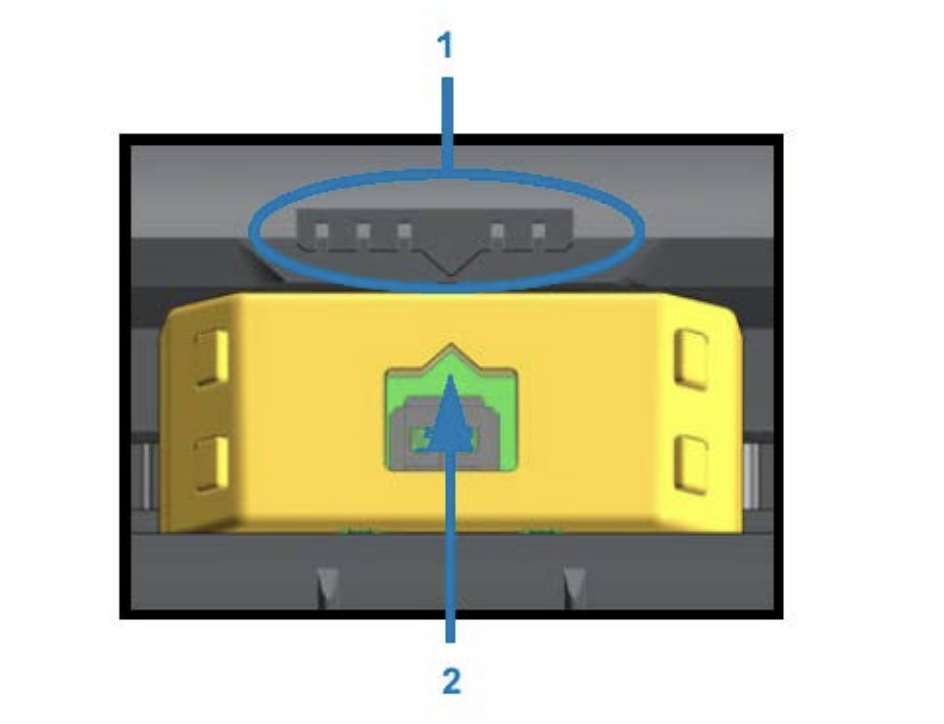
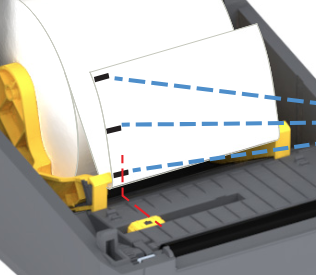
? Note: For labels that have a black mark or notch on the underside (on the removable paper protecting the adhesive layer), set the media sensor to the correct position so that the mark or notch can be detected and used to measure the label length.
Step 2: Perform calibration using the buttons
Every Zebra label printer is equipped not only with a movable sensor but also with buttons that allow you to perform calibration immediately after aligning the sensor. Without that, it simply makes no sense. However, not all Zebra label printers have the same number of buttons, and therefore calibration is not started in the same way on all of them.
Calibration instructions for the most popular models
Zebra ZD421 and ZD621 label printers:
1. Switch the printer to advanced mode (check that media is loaded and then press the pause button for 2 seconds) and press the "PAUSE" button (⏸️).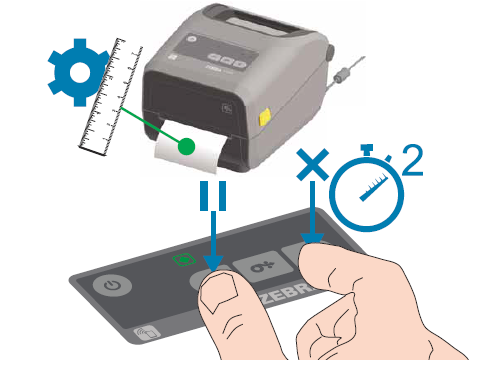 - while the "STATUS" indicator (?) lights up yellow. Indicator "STOCKS" (?) flashes yellow and then the "PAUSE" indicator (⏸️) flashes.
2. Open the printer and check whether the movable media sensor is in the center position, or if your labels have a black mark or notch, then aligned with them.
3. Remove 80 mm of labels from the liner and then place the label-free area of the liner on the platen (drive) roller so that the leading edge of the first label is under the media guides.
4. Close the printer and press the "PAUSE" button (⏸️) once.
- The media indicator flashes while the printer measures the media insert. When finished, the "PAUSE" indicator (⏸️) will start flashing.
5. Open the printer and move the label roll so that the label is located directly above the movable sensor.
6. Close the printer
7. Press the "PAUSE" (⏸️) button once.
The printer feeds and measures several labels. If it is able to determine the correct media type (gap, black mark, or notch) and measure the media length, it will return to the ready-to-print state.
Zebra ZD220 Label Printer:
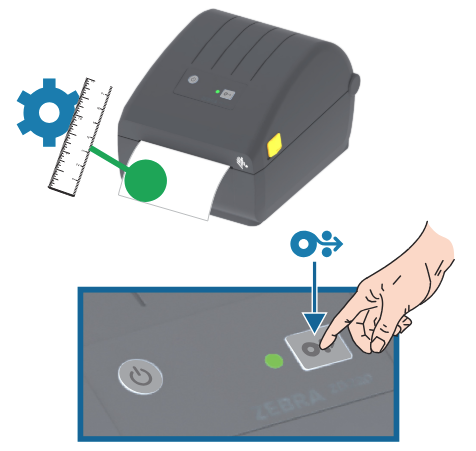
1. Make sure that the media is correctly loaded in the printer and that the printer top cover is closed.
2. Press the POWER button (?) turn on the printer.
3. Once the printer is in the ready-to-print state (the status indicator lights up green ?), press and hold the FEED button - feed ( ) for 2 seconds and keep holding until the status indicator flashes 3 times. Then release the button.
4. The printer will now measure several labels and set the media sensing level.
5. At the moment the printer stops, the status indicator lights up green again (?)).
For easy and quick setup of your new Zebra label printer, you will also certainly find the free installation of Zebra Setup Utilities useful.
Sára from CDRmarket